No products in the cart.
Blog
Mastering Style: A Guide To Cutting T Shirts For A Personalized Wardrobe
In the realm of fashion, the ability to transform a simple T-shirt into a personalized statement piece is an empowering skill. Whether you’re looking to revitalize old favorites or craft entirely new looks, the art of cutting T shirts opens up a world of creative possibilities. Join us on a journey of self-expression and style as we delve into the intricacies of cutting T-shirts to elevate your wardrobe and make each piece uniquely yours.
Things You Should Know About cutting t shirts
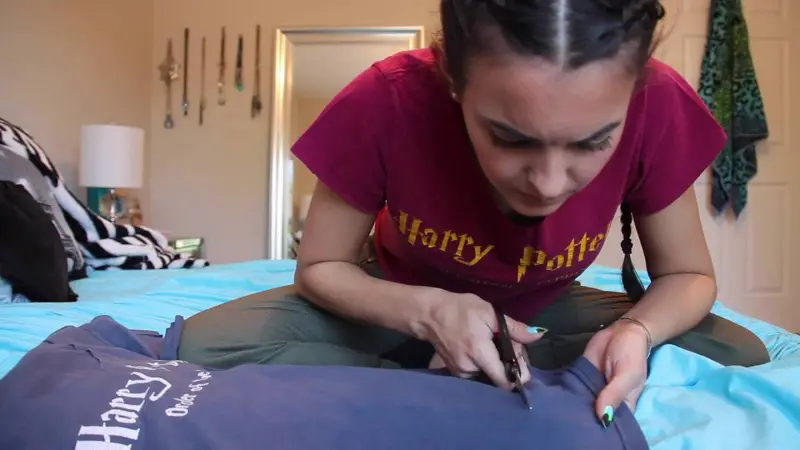
Transform a loose-fitting graphic T-shirt into a stylish crop top by utilizing fabric scissors to remove its lower portion. Create a fashionable and snug design by cutting openings on the sides or back of the shirt and interweaving the cut fabric. Enhance a roomy shirt by gathering and tying fabric at the sleeves or back neckline, adding bow-like details for a chic touch.
The V-Neck Cut

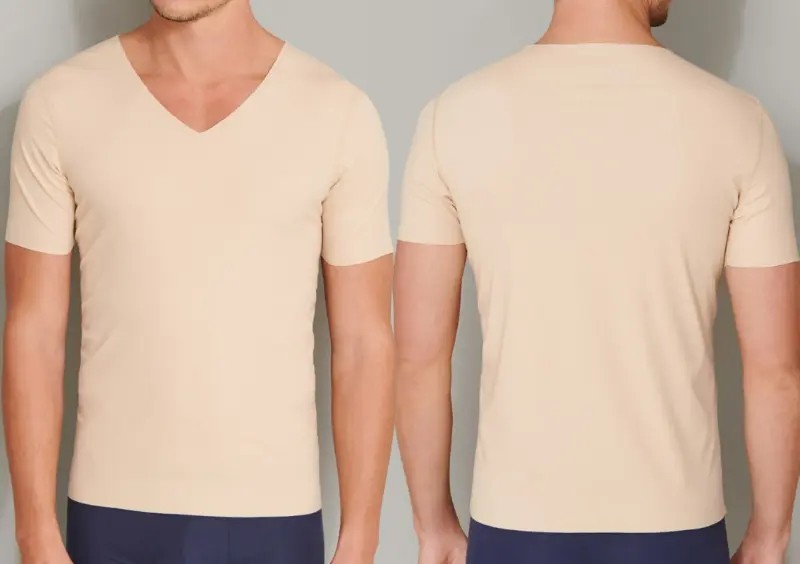
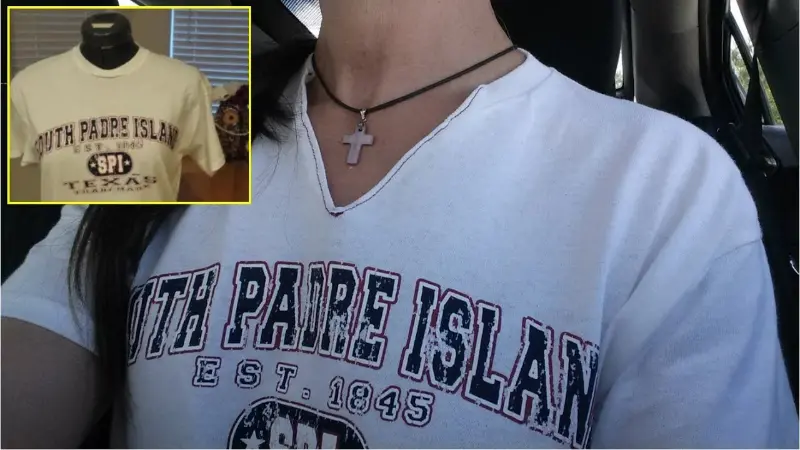
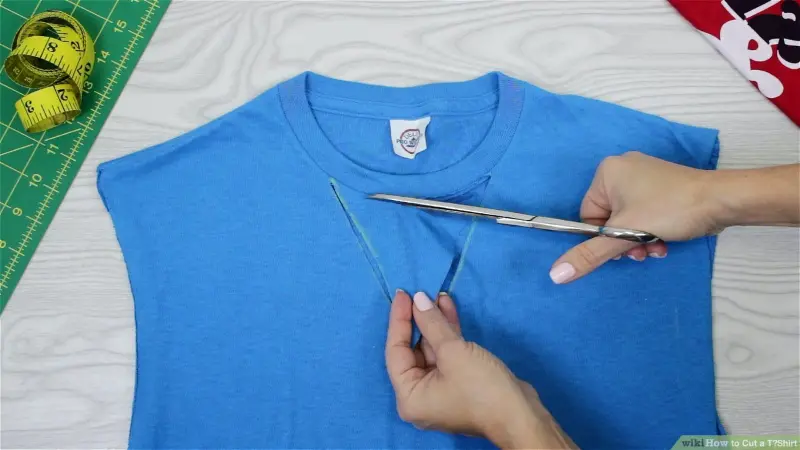
Creating a V-neck cut on a T-shirt is a simple yet effective way to add a touch of sophistication and style to your garment. Here’s a step-by-step guide on how to achieve the perfect V-neck cut:
Step 1. Choose the Right T-Shirt:
Start with a T-shirt that you want to modify. Ensure it is clean and ironed for a smoother cutting process.
Step 2. Mark the Center:
Lay the T-shirt flat on a surface. Use a fabric pencil or chalk to mark the center of the neckline. This mark will guide you in creating a symmetrical V-neck.
Step 3. Decide the Depth:
Determine how deep you want the V-neck to be. You can start with a subtle V or go for a more pronounced one, depending on your style preference.
Step 4. Draw the V-Shape:
From the center mark, draw a V-shape that meets at the desired depth. Make sure the lines are symmetrical on both sides of the center mark for a balanced look.
Step 5. Cut Along the Lines:

Use a pair of sharp fabric scissors to carefully cut along the marked lines. Take your time to ensure a clean and even cut.
Step 6. Test the V-neck:
Put on the T-shirt to see how the V-neck looks on you. Make any adjustments if needed, ensuring it complements your neckline and style.
Step 7. Optional Edging:
If you prefer, you can add a professional touch by folding the cut edges inward and sewing them down. This step helps prevent fraying and adds a polished finish.
Step 8. Wash and Wear:
After completing the V-neck cut, wash the T-shirt to remove any fabric residue. Once dry, your custom V-neck T-shirt is ready to be flaunted.
Remember, the V-neck cut is versatile and can be customized to suit various styles and preferences. Experiment with different depths and necklines to discover the look that best complements your personal fashion sense. Whether it’s a casual tee or a statement piece, the V-neck cut adds a touch of flair and uniqueness to your wardrobe.
The Cropped Cut

Transforming a regular T-shirt into a trendy cropped top is a fantastic way to add a touch of flair to your wardrobe. Here’s a step-by-step guide on how to achieve the perfect cropped cut:
Step 1. Select the Right T-Shirt:
Begin with a T-shirt of your choice. Ensure it’s clean and wrinkle-free to make the cutting process smoother.
Step 2. Choose the Length:
Decide how short you want your cropped top to be. Keep in mind your comfort level and the overall style you’re aiming for.
Step 3. Mark the Cutting Line:
Lay the T-shirt flat on a surface. Use a fabric pencil or chalk to mark a straight line across the shirt, indicating the desired length for the crop. Make sure the line is level and even.
Step 4. Double-Check Measurements:
Measure the marked line to ensure it’s consistent on both sides of the shirt. This step ensures a balanced and symmetrical crop.
Step 5. Cut Along the Marked Line:
Utilize a pair of sharp fabric scissors to carefully cut along the marked line. Take your time to ensure a clean and even cut.
Step 6. Optional Styling:
If you want to add a touch of personality, consider distressing the edges by pulling on the cut strands gently. This gives your cropped top a casual and laid-back vibe.
Step 7. Wash and Wear:
After completing the cut, wash the T-shirt to remove any loose threads or fabric residue. Once dry, your custom cropped top is ready to be styled and flaunted.
Step 8. Experiment with Design:
Get creative by experimenting with different cutting styles. You can try asymmetrical cuts, angled hems, or even add additional details like knots or ties for a unique look.
Step 9. Pairing with Bottoms:
Style your cropped T-shirt with high-waisted pants, skirts, or shorts to create a flattering and fashionable ensemble.
Cutting a T-shirt into a cropped top allows you to express your personal style and stay on-trend effortlessly. With a pair of scissors and a bit of creativity, you can give new life to your old tees, creating a wardrobe staple that’s both comfortable and chic.
The One-Shoulder Cut

Transforming a regular T-shirt into a stylish one-shoulder top is a chic and trendy way to add a touch of uniqueness to your wardrobe. Here’s a step-by-step guide on how to achieve the perfect one-shoulder cut:
Step 1. Choose the Right T-Shirt:
Begin with a clean and unwrinkled T-shirt of your choice. The one-shoulder cut works well with various T-shirt styles, so pick your favorite.
Step 2. Select the Shoulder Side:
Decide which shoulder you want to expose. Typically, the one-shoulder cut is done on the left or right side, but you can choose based on your preference.
Step 3. Mark the Cutting Line:
Lay the T-shirt flat on a surface. Use a fabric pencil or chalk to mark a diagonal line from the outer edge of the neckline to the underarm area on the chosen side. This diagonal line will create a stylish one-shoulder effect.
Step 4. Double-Check Measurements:
Ensure that the marked line is at a comfortable and flattering angle. It’s essential to maintain balance for a polished look.
Step 5. Cut Along the Marked Line:
Utilize a pair of sharp fabric scissors to carefully cut along the marked diagonal line. Take your time to achieve a clean and precise cut.
Step 6. Optional Styling:
If you want to enhance the design, consider adding additional details like ties, knots, or even decorative stitching along the cut edge for a personalized touch.
Step 7. Wash and Wear:
After completing the cut, wash the T-shirt to remove any loose threads or fabric residue. Once dry, your custom one-shoulder top is ready to be styled and showcased.
Step 8. Pairing with Bottoms:
Style your one-shoulder T-shirt with high-waisted jeans, shorts, or a skirt to create a trendy and eye-catching outfit.
Step 9. Accessorize as Desired:
Enhance your one-shoulder look with accessories like statement earrings or a bracelet on the exposed arm. This adds a touch of glamour and completes the ensemble.
The one-shoulder cut is a versatile and stylish way to breathe new life into your T-shirt collection. With a pair of scissors and a dash of creativity, you can turn a simple tee into a fashion-forward statement piece that’s perfect for casual outings or special occasions.
The Sleeveless Cut

Transforming a regular T-shirt into a sleeveless top is a classic and versatile way to give your wardrobe a cool and casual edge. Here’s a step-by-step guide on how to achieve the perfect sleeveless cut:
Step 1. Choose the Right T-Shirt:
Start with a clean and wrinkle-free T-shirt of your choice. Opt for a shirt that fits well around the shoulders and chest, as this will enhance the overall sleeveless look.
Step 2. Decide the Sleeve Length:
Determine how wide you want the sleeves to be or whether you want to create a tank top with completely removed sleeves. This choice will depend on your style preference and the level of comfort you desire.
Step 3. Mark the Cutting Line:
Lay the T-shirt flat on a surface. Use a fabric pencil or chalk to mark a line along the edge of the sleeves, indicating the desired length. Make sure the line is even on both sides for a balanced look.
Step 4. Double-Check Measurements:
Measure the marked line to ensure that both sleeves are cut at the same length. This step is crucial for achieving a symmetrical and polished appearance.
Step 5. Cut Along the Marked Line:
Utilize a pair of sharp fabric scissors to carefully cut along the marked lines. Take your time to create a clean and smooth cut, especially around the armholes.
Step 6. Optional Styling:
If you want to add a touch of flair, consider further customizing your sleeveless T-shirt by distressing the edges or adding small slits. These details can enhance the casual and laid-back vibe of the sleeveless style.
Step 7. Wash and Wear:
After completing the cut, wash the T-shirt to remove any loose threads or fabric residue. Once dry, your custom sleeveless top is ready to be styled and worn.
Step 8. Pairing with Bottoms:
Sleeveless T-shirts go well with various bottoms, including jeans, shorts, or skirts. Experiment with different combinations to create a look that suits your personal style.
Step 9. Layer or Stand Alone:
Depending on the weather and your outfit goals, your sleeveless T-shirt can be worn as is or layered with a jacket or cardigan for added versatility.
Cutting a T-shirt into a sleeveless style is a quick and easy way to revamp your wardrobe. With a pair of scissors and a touch of creativity, you can achieve a casual and comfortable look that’s perfect for warm weather or casual outings.
The Overall Distressed Cut With Cap Sleeves

Creating an overall distressed cut with cap sleeves on a T-shirt is a stylish and edgy way to give your garment a trendy, lived-in look. Here’s a step-by-step guide on how to achieve the perfect distressed cut with cap sleeves:
Step 1. Select the Right T-Shirt:
Begin with a T-shirt that you want to distress and transform. Make sure it’s clean and unwrinkled for a smooth cutting process.
Step 2. Decide on the Cap Sleeve Length:
Determine the desired length for your cap sleeves. Cap sleeves typically extend slightly beyond the shoulder but don’t reach the elbow. Mark the points where you want the cap sleeves to start and end.
Step 3. Mark the Sleeve Lines:
Lay the T-shirt flat on a surface. Use a fabric pencil or chalk to mark lines for the cap sleeves. These lines should extend from the points you marked in step 2, forming a gentle curve.
Step 4. Create the Distressed Look:
To achieve a distressed appearance, strategically cut small slits or holes along the neckline, sleeves, and hem. You can use scissors or a razor blade for this step. Be creative and vary the size and placement of the distressed elements for a unique, textured look.
Step 5. Cut Along the Sleeve Lines:

Use a pair of sharp fabric scissors to carefully cut along the marked lines for the cap sleeves. Take your time to ensure a clean and even cut.
Step 6. Optional Styling:
Enhance the distressed look by pulling on the cut strands gently to fray the edges. This adds to the worn-in aesthetic. Additionally, you can experiment with sandpaper or a wire brush to distress the fabric further.
Step 7. Wash and Wear:
After completing the cut and distressing, wash the T-shirt to remove any loose threads, residue, or markings. Once dry, your custom distressed T-shirt with cap sleeves is ready to be styled.
Step 8. Pairing with Bottoms:
Style your distressed T-shirt with cap sleeves with your favorite bottoms, such as jeans, shorts, or a skirt. The distressed look adds an effortlessly cool vibe to your outfit.
Step 9. Accessorize as Desired:
Complete your look by adding accessories like a statement necklace or layered bracelets. The distressed style pairs well with a variety of accessories for a personalized touch.
Creating an overall distressed cut with cap sleeves is a fun and creative way to give your T-shirt a fashionable and rugged appearance. With the right tools and a bit of imagination, you can achieve a unique look that stands out in any casual setting.
Conclusion
In conclusion, mastering the art of cutting T-shirts opens up a world of creative possibilities for transforming your wardrobe. Whether you’re turning a baggy tee into a trendy crop top, crafting an edgy and tight-fitting design with strategic slits and weaves, or adding stylish bow-like accents to a larger shirt, the process of cutting T-shirts allows you to express your unique style.
Armed with fabric scissors and a touch of creativity, you can elevate your fashion game and breathe new life into your wardrobe, making each T-shirt a canvas for self-expression and personal style. So, don’t be afraid to pick up those scissors and embark on a journey of T-shirt transformations – the possibilities are as endless as your imagination!


